Data Overview
The CyVerse Data Store unifies all CyVerse cyberinfrastructure. In practical terms this means that though the interfaces to the Data Store differ (e.g. Cyberduck, iDrop, iCommands, Discovery Environment, APIs, etc.) they are all operating on the same system – giving you the freedom to move between platforms. Here are some solutions for common data management tasks in CyVerse:
Key Data Store features
- 100 GB allocation per user (you may request additional storage)
- Data are automatically backed up
- Optimal transfer speeds 100GB transfer ~30 min.
- iRODS grid storage provides powerful data management tools for metadata and sharing
Quick recommendations
| Task | Recommendation |
|---|---|
| Upload or Download files (including large files, large numbers of files, and/or folders) | Use the Cyberduck data transfer application (for Windows, Mac) |
| Share data with other CyVerse users (files or folders) or create Public URLs to specific datasets | Use the Discovery Environment (any web browser) |
| Manage metadata for single files or large collections of files | Use the Discovery Environment (any web browser) or iCommands |
| Write scripts or work in the terminal/shell to manage data | Use iCommands |
Connecting to Data Store with Cyberduck
Cyberduck is a user-friendly standalone application that can serve the majority of use cases for the majority of users. Feel free to upload any data you wish to analyze, especially in the context of the workshop. If you don’t have sample data, just upload any document as a test.
Downloading and configuring Cyberduck
Download Cyberduck
- Go to the Cyberduck installation page at https://cyberduck.io/
- Follow the steps for your OS (not available for LINUX users):
- For Mac OS: Click Download Cyberduck-4.7.1.zip (or later version than 4.7.1).
- For Windows: Click Download Cyberduck-Installer-4.7.1.exe (or later version than 4.7.1, if displayed).
One-time configuration of Cyberduck for use with CyVerse
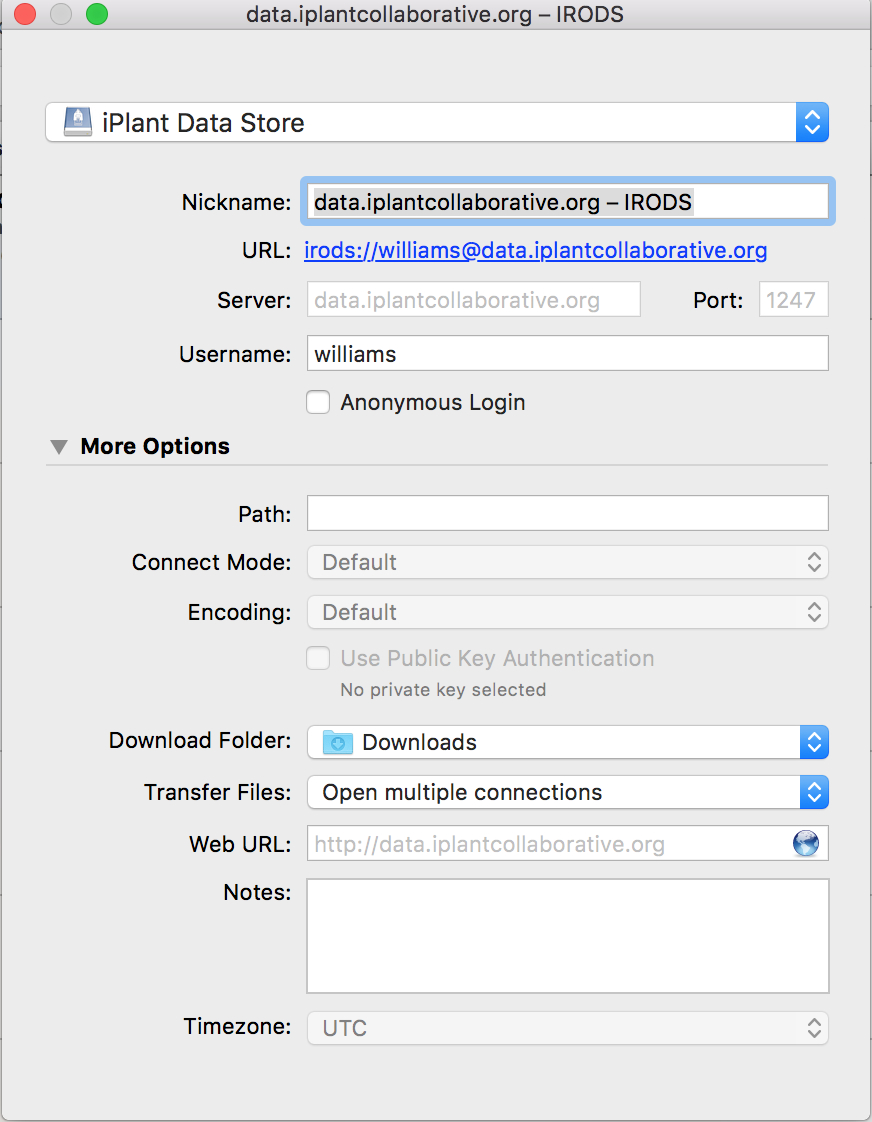
- Download the CyVerse configuration profile
- Double-click on the downloaded profile, Cyberduck should automatically start.
- Verify iPlant Data Store is displayed in the first field.
- In the Nickname field, enter data.iplantcollaborative.org – iRODS
- Create a connection that uses your CyVerse user account for login (Optionally: you may create an anonymous connection to access public data without an iPlant user account - see full CyVerse documentation)
- In the populated URL field, verify irods://data.iplantcollaborative.org is displayed.
- In the Server field, enter data.iplantcollaborative.org.
- In the Port field, enter 1247.
- In the Username field, enter your CyVerse user name.
- Verify your username is added to the URL field (e.g.: irods://yourusername@data.iplantcollaborative.org.)
- In the More Options section, select Open multiple connections in the Transfer Files drop-down list.
Example completed Cyberduck configuration
Uploading and downloading from the Data Store with Cyberduck
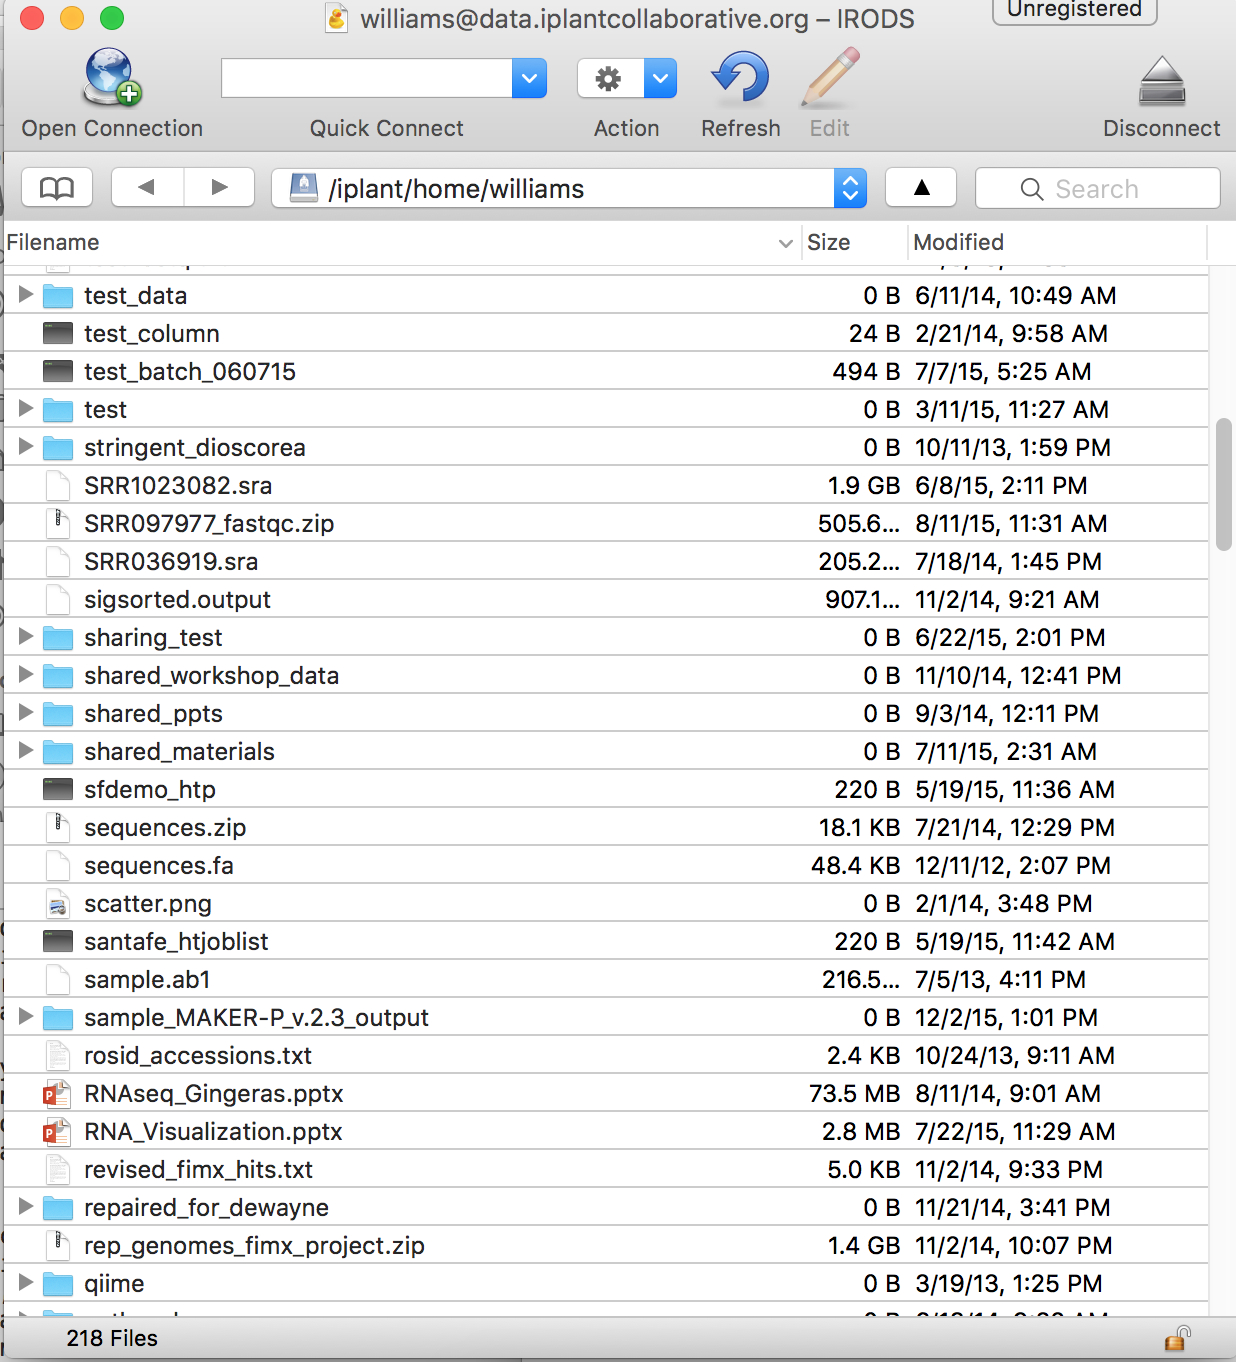
In the Cyberduck window, double-click a bookmark. Log in to Cyberduck using your CyVerse username and password. By default, your Home folder is selected.
Upload to Data Store
- Drag the file and folder from your local computer to the desired location in you CyVerse Data Store.
or
- Click the Cyberduck File menu and then click Upload and select the file or folder to upload - the item is uploaded to your Home folder
Download from Data Store
- Drag the file and folder from your CyVerse Data Store to the desired location on your local computer.
or
- Select the file or folder to download and select the Cyberduck File menu and then click Download - the file is downloaded to your default download folder.
Tip: To navigate to a different folder (for example, to download a file from the Community Data folder) 1. Click the Cyberduck Go menu and then click Go to Folder. 2. Enter the path to the folder (you may want to copy the path to the folder displayed in the DE Data window's Viewing field).For example, to go to the Data Store Shared folder, enter /iplant/home/shared; Click Go.
Cyberduck window connected to Data Store
Connecting to Data Store with iCommands
iCommands is a collection of commands for Unix and Mac that are used in the iRODS system to interact with the CyVerse Data Store. Many commands are very similar to Unix utilities. For example, to list files and directories, you use ls in Linux, but in iCommands you use ils.
While iCommands are great for all transfers and for automating tasks via scripts, they are the best choice for large files (2-100 GB each) and for bulk file transfers (many small files). For a comparison of the different methods of uploading and downloading data items
Downloading and configuring iCommands
iCommands is available for Mac and Linux. You must download the binaries and configure them for use. We will not cover all of the iCommands here but some important resources include:
- Full CyVerse iCommands Documentation
- iRODS official iCommands Documentation
Download iCommands
- Select the iCommands binary for your platform:
- For Mac: Download the Mac binary.
- For Linux: Download either the Linux 64-bit binary or the Linux 32-bit binary.
- Untar/decompress the download (e.g.
mkdir icommands && tar -xvf irods3.3.icmds.mac.intel.tar -C ./icommands)
Tip: You may wish to add iCommands to your path information on how to add the resulting iCommands directory to your $PATH, see UNIX / Linux: Set your PATH Variable Using set or export command
Configure iCommands
In a terminal window, enter the following to initialize iCommands and your Data Store connection.
- Initialize iCommands using the
iinitcommand - You will then be asked to setup your account and will need to enter the following information
| Prompt | Entry |
|---|---|
| irodsHost | data.iplantcollaborative.org |
| port | 1247 |
| zone | iplant |
| irodsUserName | your iplant username |
| Current iRODS password | your iplant password |
Tip: Verify that you have connected to your iPlant Data Store; view the contents of your home directory using the following the
ilscommand.
Uploading and downloading with iCommands
Uploading to Data Store
To move data from a local source to the Data Store use the iput command. In this case we pass the -P option to see the progress of the transfer.
$ iput -P remote_machine_file.txt .
Tip: in this case, the '.' stands for the current CyVerse working directory which is by default '/iplant/home/your-cyverse-username'
Downloading from Data Store
Use the iget command to move files from the Data Store into your remote machine:
$ iget -P datastore_file.txt .
There are several other iCommands options (including how to use the -T option for more reliable big data transfers, and -r command for recursive transfers of directories - See iCommands documentation.
Sharing data with the Discovery Environment
The Discovery Environment is a powerful web interface to data management tools, computation, and bioinformatics tools. In this tutorial, we will focus on data sharing features.
Sharing with a data link in the CyVerse Discovery Environment
Use: Create a link to share an individual file with anyone.
All of the instructions in this section will focus on the Data Console:
-
Log into the Discovery Environment DE Login
-
In the Data console, next to the file click the
 icon or select a file you wish to share, then from the Share menu click via Public Link. Note, only individual files can be shared from a public link.
 - In the “Manage Data Links” window, select the file you wish to share, and click Create. Note: The manage links menu will only display if you use the 'Share' menu, not the shortcut link icon.
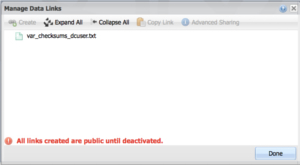
- A new URL should appear beneath the file name. Click on this URL and the click on Copy in order to be presented with a window that will allow you to copy the URL to your clipboard. Anyone who you share this link with will be able to download the file.
- Deactivate a data link by selecting the file; from the Share menu click via Public Link. Clicking the
 icon next to the links you wish to inactivate. Once you deactivate the link, anyone with whom you shared it with will no longer be able to access that data.
Sharing with colleagues link in the CyVerse Discovery Environment
Use: Share data with another CyVerse user by granting permission to read, write, or own files/folders
- Click the
 icon or check-select a file(s), folder(s) you wish to share with another user; then either click ‘Begin Sharing’ on the right-hand Details menu or click Sharing and select via Discovery Environment.
 - In the “Manage Sharing” menu, under ‘Selected File(s)/Folder(s) the name of the files and folders you are currently sharing are displayed. Ensure the file you wish to share now is selected.
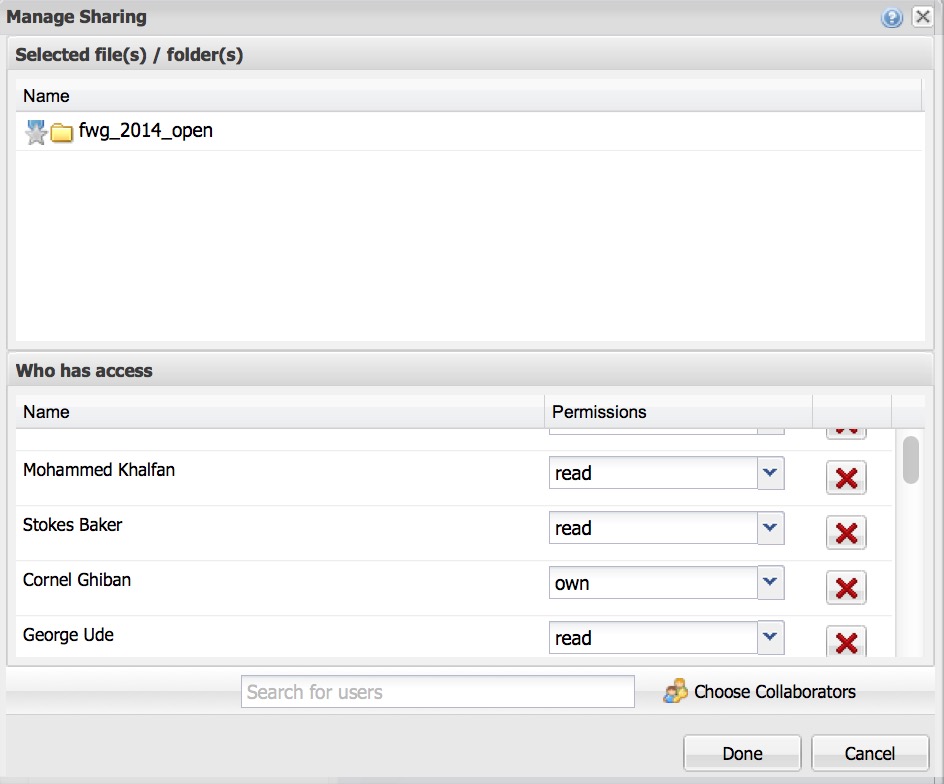
- In the ‘search for users’ menu search for the CyVerse user you wish to share with by search for their name, or CyVerse username. You may also select ‘Choose from Collaborators’ which will bring up a list of people you have designated as collaborators.
- Next, under ‘Permissions’ choose what permission you want to grant the person you are sharing this file with.
- Once you are finished, click Done to begin sharing. The user will be notified that a file has been shared with them.
Tip: Files shared with you appear in the ‘Shared With Me’ top-level folder in the Data console. You will also get a notification when something is shared.
Permission level chart
| Permission Level | Read | Download/Save | Metadata | Rename | Move | Delete |
|---|---|---|---|---|---|---|
| Read | X | X | View | |||
| Write | X | X | Add/Edit | |||
| Own | X | X | Add/Edit | X | X | X |